Templates[]
- Let’s start with character templates. What is a character template? It’s just a set of attributes which describe a character. A template usually contains a defined character appearance, character name (this pertains mainly to storyline characters, abilities, combat styles etc.).
For the purpose of this manual, we’re creating an adventure where Geralt’s quest is to defeat the ring-leader of the bandits on Siegfried’s order. Siegfried will be our NPC. Jethro, the avid dice poker player, will be a friendly character and there will be several bad guys. Five character kinds of characters will be created:
- Siegfried – a knight and our employer,
- Jethro – a guard and avid dice poker player,
- The Professor – ring-leader of the bandits and the key character in our quest,
- The Professor’s guards – two personal bodyguards (one template will be enough to create them),
- The wolves – five wolves (as with the bodyguards, one template will suffice).
The individual characters will be created using templates. Let’s start with Siegfried. First, launch the D’jinni Editor and then create a new NPC template by selecting New -> Template -> Creature (.utc) from the File menu:

The new creature template window will open on the right side of the screen:
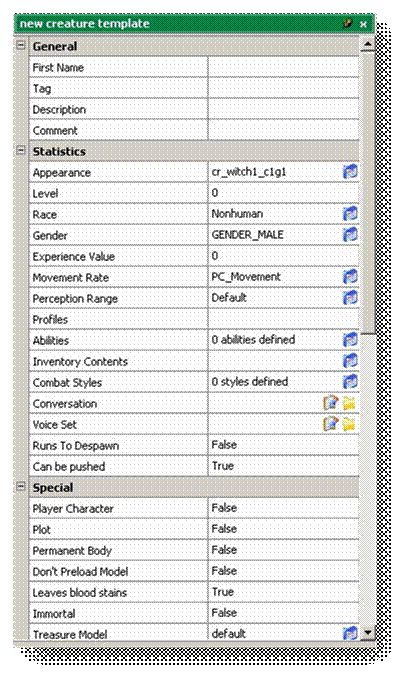
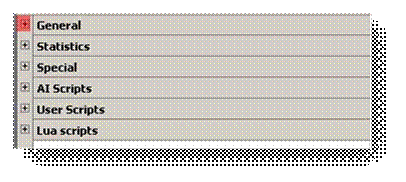
This Properties window has the same basic appearance as the module and area Properties windows but it contains different attributes. As a reminder, the window is divided into two columns, with attributes located in the left column. The window is divided into the following sections: General, Statistics, Special, AI Scripts, User Scripts and Lua scripts. To facilitate movement between sections, they can be minimized by clicking the ‘-‘ signs located next to each section name:

To open a previously minimized group, click on the small ‘+’ sign next to that section’s name:
The value of each attribute is found in the right-hand column. Each attribute defines a certain element of a character. The list of attributes is also quite long, so you can scroll up and down using the bar on the right: 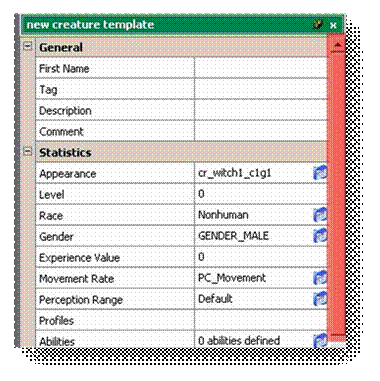
Let’s assign the attributes for Siegfried. The meaning of the relevant attributes will be discussed along the way:
General Section[]
First Name[]
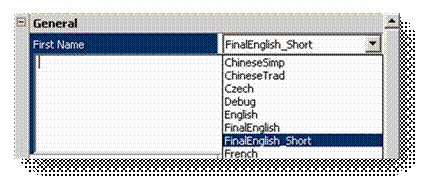
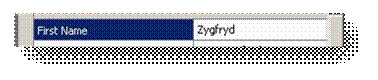
Contains a description of the character. More specifically, this is the name which is visible above the character in the game. Note that it is possible to select a different language for the description. Click on the right-hand column opposite the First Name attribute and select FinalEnglish_Short from the list that appears:
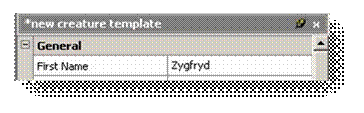
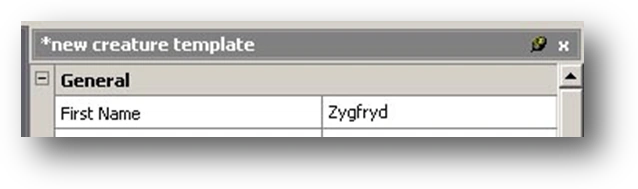
Now enter the name Siegfried and press ENTER:
Last Name[]
Not used.
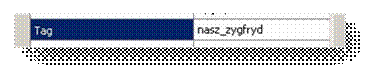
Tag[]
Dedicated to the flags describing a particular character. Mainly used with scripts, which will be discussed later in this manual. Call this our_siegfried. The name Siegfried alone could technically be used, but a character with that tag has already been defined by the creators of The Witcher. There’s no need to create unnecessary complications, so we’ll give this character a different tag. To enter the text, click on the right-hand column opposite the Tag attribute, type in our_siegfried and press ENTER:
Description[]
Not used.
Comment[]
Contains a space in which to write a comment. This is not used by the game, it’s just an information field. You can write whatever you want here, for example information about the character.
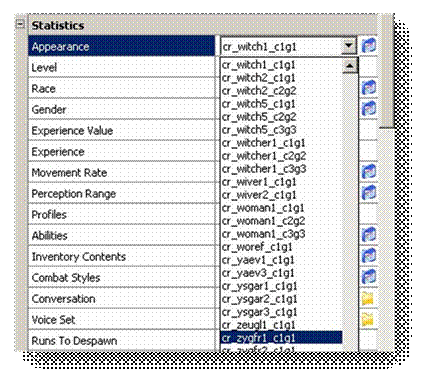
Statistics Section[]
Appearance[]
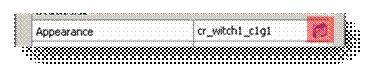
This attribute describes the appearance of a character. on the right-hand column opposite the Appearance attribute and select cr_zygfr1_c1g1 from the list:
The list is extensive and can be navigated using the bar on the right side. Check this brief List of NPC Models in the standard game. Now click on the small blue icon located next to the list:
This will open the appearance.2da file:
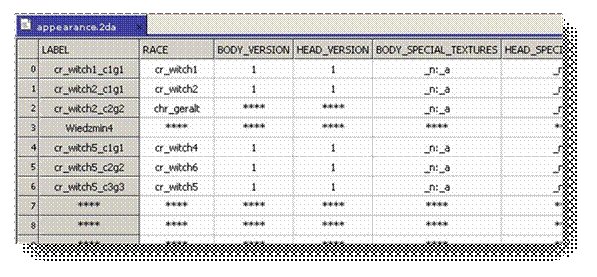
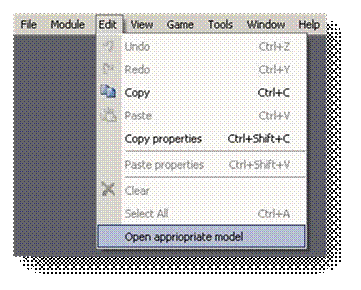
This database describes the appearance of individual characters in The Witcher. For the moment we won’t discuss .2da files any further. They’re described in another chapter of this manual. To preview a three-dimensional model of the character, select Open appropriate model from the Edit menu:
After a moment, the character appears:

The character model has been loaded into one of the D’jinni’s many plug-ins. In this case it’s the ModelViewer, a plug-in which displays models. If the Open appropriate model option is not available or accessible in the Edit menu, this indicates that the new creature template window is probably inactive. If the window is inactive, the title bar will be grey:
To activate the window, click on it anywhere, the title bar being the best choice. If the title bar displays a color other than grey, it means that the window is active:
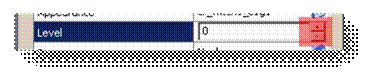
Level[]
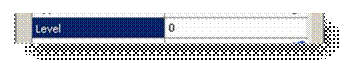
Determines the character’s experience level. This level is used to calculate the number of experience points Geralt earns by killing the character. If the character’s level is higher than Geralt’s, additional experience points are assigned; if the character’s level is lower than Geralt’s, the amount of experience assigned is decreased, with 1 point being the minimum level. Since Siegfried is Geralt’s friend, however, he cannot be killed by a player. Thus the value we want is 0. To change the setting, click on the right-hand column opposite the Level attribute, enter the value of 0 and press ENTER:
The value can also be changed using the small arrows located opposite the Levell attribute:
Race[]
Determines the character’s race. To change the setting, click on the right-hand column opposite the Race attribute. For Siegfried, select the Human option:
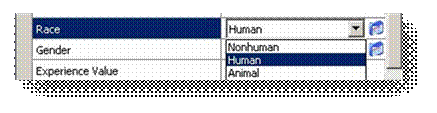
The values you can assign to this attribute are:
- - Nonhuman – elf or dwarf,
- - Human,
- - Animal,
- - Spectre – spectre or ghost,
- - Vampire,
- - Ornitoreptile – crawling monster (e.g. wyvern, basilisk, cockatrice),
- - Ordinary Monster,
- - Insectoid,
- - Carrion.
You can also click on the blue icon located next to the selection list. This opens the racialtypes.2da file, the database of races available in The Witcher.
Gender[]
Determines the character’s gender. To change the setting, click on the right-hand column opposite the Gender attribute. Since Siegfried is a man, select GENDER_MALE from the list of options:
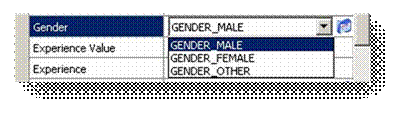
The values you can assign to this attribute are:
- - GENDER_MALE
- - GENDER_FEMALE
- - GENDER_OTHER
You can also click on the blue icon located next to the selection list. This opens the gender.2da file, the database of genders available in The Witcher.
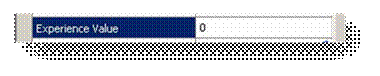
Experience Value[]
Determines the basic amount of experience assigned after a character is killed by Geralt. This value is modified by an appropriate co-efficient coming from the difference in levels between Geralt and the slain character. In Siegfried’s case, enter a value of 0 and press ENTER:
The value can also be changed using the small arrows located opposite the Experience Value attribute:

Experience[]
Not used.
Movement Rate[]
Determines the rate at which a character moves. To change the setting, click on the right-hand column opposite the Movement Rate attribute. For Siegfried, select the Normal option from the list:

You can also click on the blue icon located next to the selection list. This opens the creaturespeed.2da file, the database containing movement rate values (running, walking etc.). The values you can assign to this attribute are:
- - PC_Movement – player speed,
- - Immobile,
- - Very_Slow,
- - Slow,
- - Normal – normal speed,
- - Fast,
- - Very_Fast,
- - Default – default movement speed,
- - DM_Fast,
- - Witcher – Witcher speed, fastest speed in the game (only applies to the Witcher).
Perception Range[]
Determines a character’s perception range. If one character appears in the range of another character, it will take actions linked to the Profiles attribute settings. To change the setting, click on the right-hand column opposite the Perception Range attribute. For Siegfried, select the VeryShort option:

You can also click on the blue icon located next to the selection list. This opens the perceptionrng.2da file, the database containing perception ranges. Note that characters in The Witcher have two states associated with their perception ranges, listen and spot. The values you can assign to this attribute are:
Label Spot Listen Default default default Player 35 20 Short 15 15 Medium 25 20 Long 35 20 VeryShort 7 5 VeryLong 45 38
Range in the Witcher is not measured in meters or any other familiar units of measure. Range is just a distance defined by the creators of The Witcher. For example, setting the Perception Range attribute to Medium indicates that the character will notice the player, when they approach to a range of 35 units (or less), however the character will react to the player according to Profile attribute settings only after the player will approach to a range of 20 units. The example above is represented by the following diagram:


Profiles[]
Determines a character’s behavior depending on the circumstances occurring in the game and the player’s actions. This attribute contains a series of options which are selected and highlighted from the list:
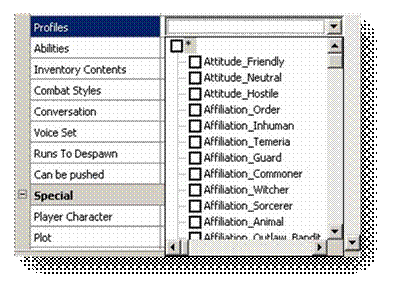
The list is quite long and can be navigated using the bar on the right side of the list. The options available can be divided into the following categories:
- - Attitude – defines the attitude of the character towards the player:
- Friendly – character will have a friendly attitude towards the player and will not attack,
- Neutral – character will not attack the player, however the player can attack the character,
- Hostile – character will be hostile towards the player and will attack whenever possible,
- Fistfighter – character will participate in fist fights.
- - Affiliation – defines the faction with which a character is affiliated. Characters belonging to the same faction will help each other in combat. They will also be attacked by characters who are hostile towards this group:
- Order,
- Inhuman – non-human races (elf, dwarf),
- Temeria – resident of Temeria,
- Guard – also important to duels, characters with this affiliation will aid Commoners,
- Commoner,
- Witcher,
- Sorcerer,
- Animal,
- Outlaw_Bandit,
- Outlaw_City – outlawed city resident,
- Outlaw_Salamander – outlawed member of the Salamandra,
- Outlaw_Scoiatael – outlawed member of the Scoia’tael commandos,
- Monster_Undead,
- Monster_Magic – magical monster,
- Monster_Experiment – experimental monster,
- Monster_Animal – animal monster,
- Bandit_Neutral – neutral bandit,
- Lawful,
- Vodianoi – character belongs to the Vodyanoi,
- Kikimora_Pheromones – character is marked by a kikimore warrior and will be attacked by other kikimores who normally are neutral,
- Boss – a special category to describe bosses in the game,
- Local1…Local – can serve as a definition of one’s own faction,
- Monster_Ornitoreptile – crawling monster (basilisk, cockatrice, wyvern),
- Monster_Insectoid – insect-like monster,
- Monster_Carrion – carrion-like monster,
- Monster_Spectre,
- Zeugl
- - Behavior – defines a character’s behavior during combat:
- Aggressive – character will try to approach an enemy quickly,
- Defensive – character will try to maintain its position; if unsuccessful, will approach the enemy,
- Coward – attacked character will flee.
- - Tactics_DontSurround – by default, the characters in the game will try to surround a rival in such a way so that at least one of them is attacking from behind. Setting this option will make the attacking enemies surround the target randomly.
- -Role – defines which role a character will play:
- Victim – character will become victim,
- Leader – character will be a leader,
- Healer – character will heal the wounds of other characters,
- Shooter – character will attack at range (archer),
- PC_Follower – character will follow the player,
- DoNotHelpFriends – character will not help friends,
- IgnoreAll – character will ignore everyone,
- IgnoreMe – character will ignore player,
- PCAttacker,
- NPC_Follower – character will follow another character,
- DoNotHelpMe – character will not help player,
- - Alcohol – defines how quickly a character will become intoxicated:
- Mild_3 – weak alcohol, drunk after 3 drinks,
- Mild_5 – weak alcohol, drunk after 5 drinks,
- Mild_7 – weak alcohol, drunk after 7 drinks,
- Medium_3 –medium alcohol, drunk after 3 drinks,
- Medium_5 – medium alcohol, drunk after 5 drinks,
- Medium_7 – medium alcohol, drunk after 7 drinks,
- Strong_3 – strong alcohol, drunk after 3 drinks,
- Strong_5 – strong alcohol, drunk after 5 drinks,
- Strong_7 – strong alcohol, drunk after 7 drinks.
- Enemy – defines which factions a character is hostile towards. Works in conjunction with the Affiliation settings. The character will attack anyone whose Affiliation list has at least entry which is antagonistic to the character’s factions. The individual options are the same as in Affiliation.
- - Species – defines a character’s species:
- Sheep,
- Dog,
- Echinops
- - Internal_Charmed – character is under a spell.
- - AfraidOf – defines which factions a character will be afraid of and will attempt to flee. The values you can assign to this attribute are the same as in Affiliation.
- Ignore_Rain – character will ignore rain and will not attempt to hide from it,
- Limited_Attackers_1.
- Limited_Attackers_2.
- Limited_Attackers_3.
- Immobile – character will not move,
- - Formation – formation in which a character will move. This pertains to characters belonging to the same factions and acting as part of a group, e.g. patrols:
- Column,
- Circle,
- Line.
A wide variety of profile configurations is possible with such extensive options available. Now let’s get back to Siegfried and set-up his profile. Select by clicking the small square next to the profile option:
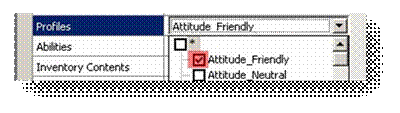
Click on a previously selected profile option to un-check it. To set all profile options (not recommended), just click the small square located next to the asterisk:
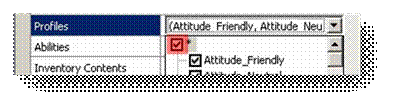
Set the following profile options for Siegfried: Attitude_Friendly, Affiliation_Order, Affiliation_Witcher, Behavior_Aggressive, Tactics_DontSurround, Enemy_Outlaw_Bandit, Enemy_Outlaw_Salamander, Enemy_Monster_Undead,Enemy_Monster_Magic, Enemy_Monster_Experiment, Enemy_Monster_Animal.
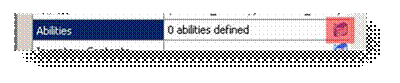
Abilities[]
Determines character statistics, i.e. character abilities. To set a character’s abilities, click on the blue icon located in the right-hand column opposite the Abilities attribute:
This will open the Creature Attack Abilities window:
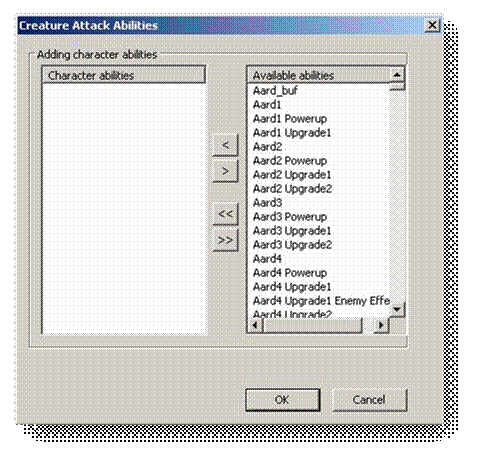
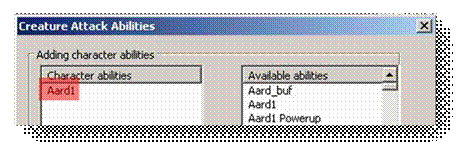
All abilities currently assigned to the character are located in the Character abilities panel, while all available abilities can be found in the Available abilities panel. Each of the abilities is associated with varying statistics, such as the number of life and/or energy points or resistance/immunity to various states, for example resistance to being stunned or put under a spell. To add abilities to a character, select the appropriate ability from the Available abilities panel and click the ‘<’ button:

The ability will automatically appear in the Character abilities panel, which indicates that it has been assigned to the character:
To remove an ability, select it from the Character abilities panel and click ‘>’:

More than one ability can also be selected. Do this as in other Windows applications, by clicking and holding down CONTROL or SHIFT. To assign all of the available actions at once, clicking ‘<<’:

Clicking on ‘>>’ will remove all character abilities. The exact meaning of all the abilities will not be discussed here. Assign the finisher_1h_sword_with_item ability to Siegfried. Select it and click ‘<’:
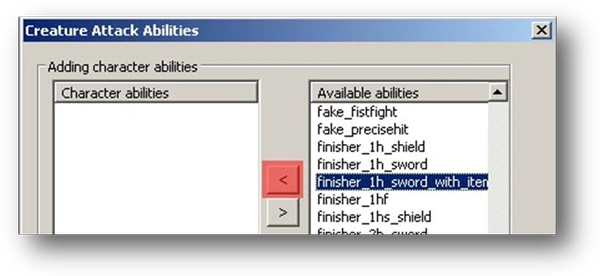
You can also double-click on the ability name and get the same result as using the ‘<’ button. Because this list is long, you can make the search easier by selecting the first ability from the Available abilities panel and then typing ‘F’. The list will then jump to abilities starting with the letter ‘F’. Once the ability is assigned to Siegfried, select OK.
Inventory Contents[]
Determines a character’s inventory items. To create an inventory for a character, click on the small blue icon located in the right-hand column opposite the Inventory Contents attribute:

The Inventory Contents window will open:

Three panels can be distinguished in this window:
- -Inventory – a character’s inventory, divided by slots:
- Head,
- Chest belt – front – belt on chest,
- Chest belt – back – belt on chest,
- Neck – necklace,
- Right leg,
- Left leg,
- Right ring – ring on right hand,
- Right hand,
- Left hand,
- Left ring – ring on left hand,
- Arrows – space for arrows,
- Belt - front slot – front belt slot,
- Belt - right front slot – right front belt slot,
- Belt - left front slot – left front belt slot,
- Belt - left slot – left belt slot,
- Belt - right slot – right belt slot,
- Silver sword – space for silver sword,
- Steel sword – space for steel sword,
- Short weapon 1 – first space for a short weapon,
- Short weapon 2 – second space for a short weapon,
- Big weapon – space for large weapon located on the back,
- Trophy – space for a trophy (hook) displayed on Geralt,
- Medallion,
- Elixir 1 – first space for elixir,
- Elixir 2 – second space for elixir,
- Elixir 3 – third space for elixir,
- 1st Creature Weapon,
- Creature Armor – (pertains to monsters only),
- Left arm,
- Right arm,
- - Repository – a character’s repository (don’t mistake this with an Inn Owner’s store). This is where the remaining items (alchemy ingredients, books etc.) which characters carry in their inventories are located.
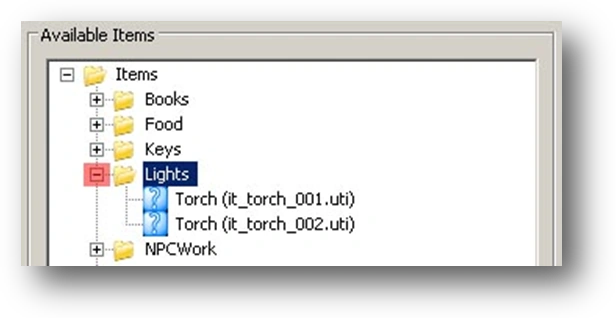
- - Available Items – the entire list of items available in the game is located here. Items are divided into categories and organized in a tree structure, making item orientation and search easier. Items are divided into the following categories:
- Books – books and alchemical recipes
- Foods,
- Keys,
- Lights – various sources of light, e.g. torches
- NPCWork – special items used by characters to perform activities, e.g. lutes,
- Other – all leftover items which do not fit into the other categories,
- Player_Weapon – the player’s weapons, i.e. steel and silver swords
- Potions&Ingredients – potions and ingredients; this category is divided into sub-categories:
- Base greases,
- Bombs,
- Drink – beverages including alcohol,
- Greases,
- Ingredients,
- Potions,
- Powders,
- Uniques,
- Quest_Items – items tied to quests (these are divided according to acts in the game),
- Upgradecomp – items used to upgrade weapons (meteorites and runes),
- Valuables – valuable items (orens, rings, etc.),
- Virtual – special types of virtual items. Each virtual item has its own repository where other, real items can be found as loot (like books, food etc.). If Geralt finds a virtual item, he will receive one randomly selected real item from the virtual item’s repository,
- Weapons&Armor.
To open a category and see which items fall into it, double-click on the name or click on the small ‘+’ sign located next to the name of that category:
Now to Siegfried’s inventory. To begin with, he will get a torch and a steel sword as a weapon. Start with the torch and place it in his left hand. To make things easier, move the scroll bar on the Inventory panel so the Left hand slot is visible on the panel:
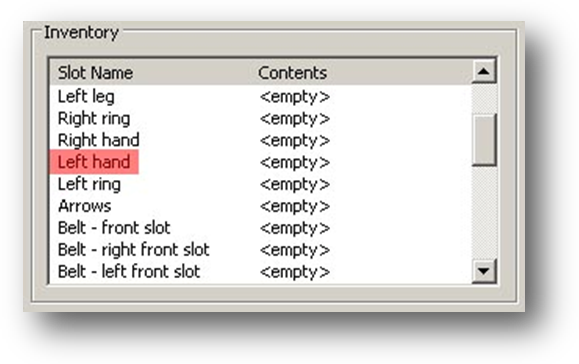
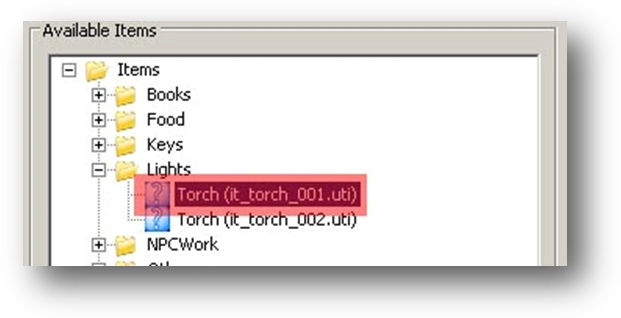
Opposite the Left hand slot is the word <empty> indicating that the slot is unoccupied. On the Available Items panel, open the Lights category and click on Torch (it_torch_001.uti):
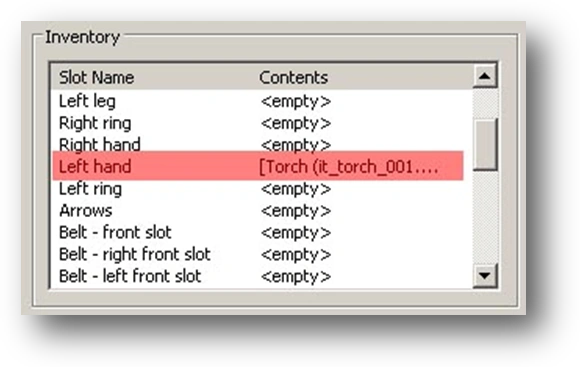
To put a torch into Siegfried’s hand, left-click and drag the Torch (it_torch_001.uti) item to the Left hand slot. When the <empty> phrase has changed to <insert Torch (it_torch_001.uti)>, release the left mouse button. Siegfried has now received a torch which he will carry in his left hand:
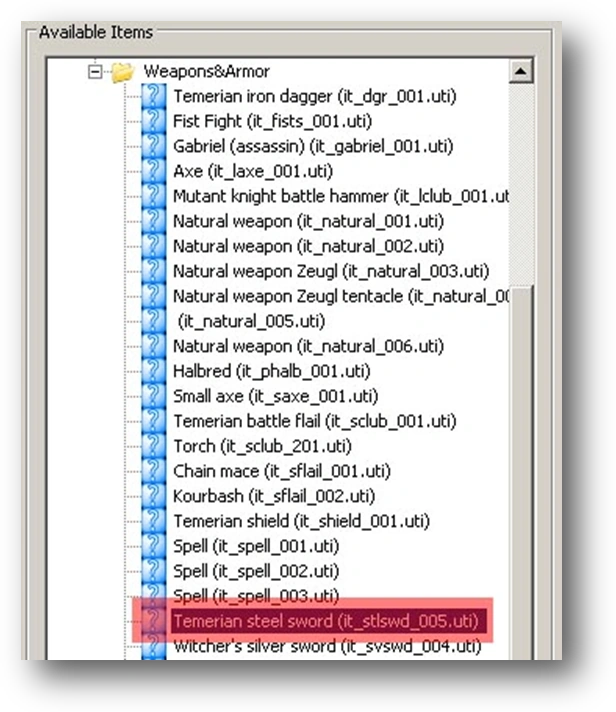
If an item cannot be placed in a certain slot, the cursor will change to an action denied sign. If an item fits in a particular slot, the cursor will change to a hand sign. Repeat the same steps to equip Siegfried with his sword. Using the scroll bar in the Inventory panel, move down so that the large weapon slot, i.e. Big weapon, is visible in that panel:

In the Available Items panel, open the Weapons&Armor category and select Temerian steel sword (it_stlswd_005.uti):
As with the torch, drag the Temerian steel sword (it_stlswd_005.uti) item onto the Big weapon slot and then release the left mouse button:

Siegfried has now been armed with a sword. It would be useful if he also had a few orens (the currency of The Witcher). To equip him with some orens, open the Valuable category in the Available Items panel and select Orens (it_gold_001.uti):
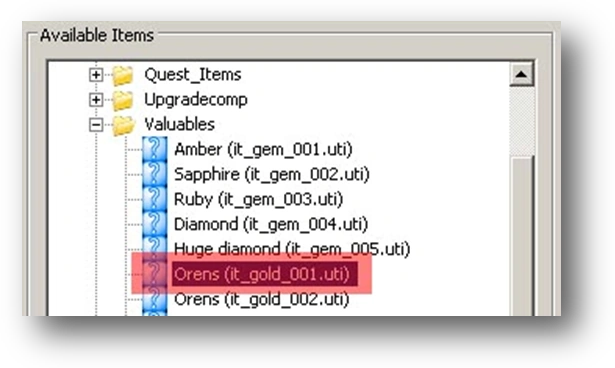
Now drag the Orens (it_gold_001.uti) item to the Repository panel and release left mouse button. The item will appear in Siegfried’s repository:

There are two more options located at the bottom of the Repository panel:

These two options:
- -Dropable – an item from the repository can be dropped by the character,
- -Pickpocketable – an item from the repository can be pick-pocketed.
To assign these options to an item from the repository, click on the item in Repository panel and then select the option(s) by clicking on the appropriate square(s):

Dragging the Orens (it_gold_001.uti) item to the Repository panel changes the color of the background noticeably:

This indicates that the item can be placed anywhere in the character’s repository. Try moving the Temerian steel sword (it_stlswd_005.uti) item to the Repository panel. This time, the background color of the Repository panel has turned both red and green:

This indicates that this item must be placed in a specific place in the character’s repository only, in this case the bottom half of the panel. Of course, items from the character’s repository can also be removed. This is done by selecting the item to be removed from the Inventory panel or Repository, dragging it off the panel and releasing the key.
After you’ve finished adding items to Siegfried’s repository, select OK at the bottom of the Inventory Contents window.
Combat Styles[]
Defines the combat styles used by a character. To define the combat style, click on the small blue icon located in the right-hand column opposite the Combat Styles attribute:

This opens the Combat Styles window:
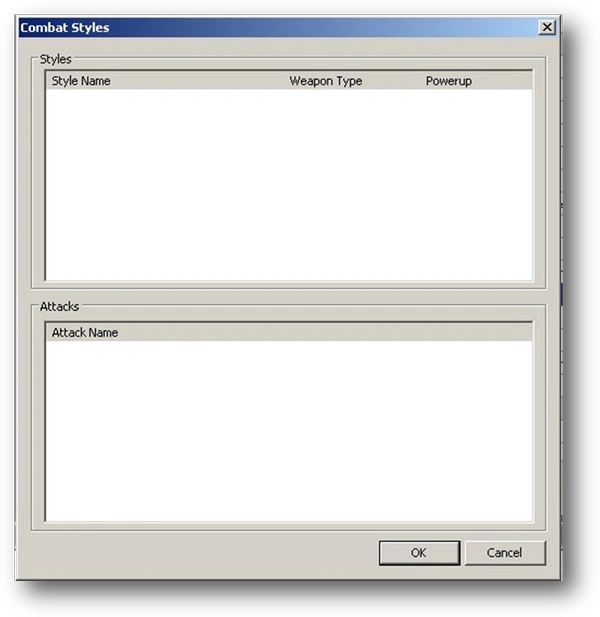
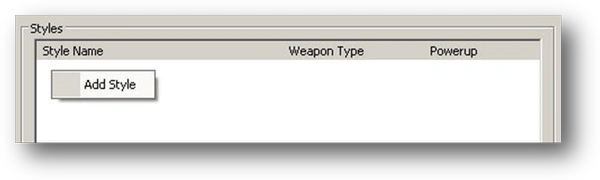
The window is divided into two panels: Styles, where combat styles and the weapon assigned to a particular style are shown; and Attack, where the list of attack sequences assigned to a particular style are shown. A character may have several combat styles defined, depending on the weapon equipped, and several attack sequences assigned for each combat style. This does not pertain to monsters, which usually have one combat style and one attack assigned to them. To add a new combat style, right-click on the Styles panel, then select Add Style from the menu which appears:
This opens the Styles window:

Add the style name in the Name field. However, the name assigned needs to correspond with a style from the list below:
- -WitcherSteelFast – a combat style using a one-handed swords,
- -ShortWeaponFast – a combat style using axes and bludgeons,
- -SwordWithShield – a combat style using a shield and a one-handed weapon,
- -TwoHanded – a combat style using a two-handed weapon,
- -PolearmHeavy – a combat style using a polearm,
- -TwoSwordFast – a combat style using two weapons, mainly two swords,
- -DaggerFast – a combat style using a dagger,
- -Bow – a combat style using a bow,
- -Crossbow – a combat style using a crossbow,
- -Commoner – a combat style used by untrained opponents such as bandits or militia,
- -Monster – a combat style reserved for monsters,
- -SpellRanged – a combat style using magic,
- -FistfightCommoner – a fist fighting combat style.
For Siegfried, assign a one-handed sword combat style. Enter WitcherSteelFast in the name field:

From the Weapon Type selection list, choose a weapon type. This needs to correspond to the type entered in the Name field, which is why we will select WitcherSteelSword from the Weapon Type list:

The Powerup list is not used. Click OK. Now a combat style has been added to Siegfried and is visible in the Styles panel:

Right-click on the newly added combat style to open a more extensive menu:
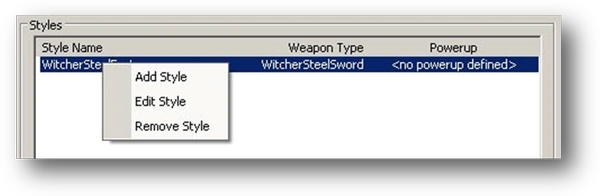
The available menu choices are:
- -Add Style – add another combat style,
- -Edit Style – edit the selected combat style, which opens the Styles window again so that corrections can be made (double-clicking on the combat style has the same effect),
- -Remove Style – removes the selected combat style (clicking on the combat style and selecting DELETE has the same effect).
Several combat styles can be created for each character, depending on the type of weapon the character is wielding. One style of combat for Siegfried is enough, though. Now add a sequence of attacks to this newly created style. To do so, select the combat style and right-click on the Attacks panel. A Select Add Attack from the menu which appears:

This opens the Attacks window:

The details of each attack will not be described here. Go ahead and select h_bas_sword1h01 from the list:
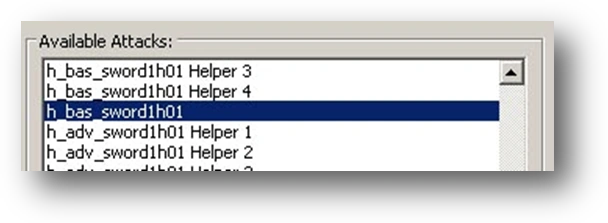
This is a basic attack using a one-handed sword. Click OK and the selected attack will appear in the Attacks panel:

Just as with combat styles, right-click now on the new attack we’ve assigned in this step. The same menu will appear:
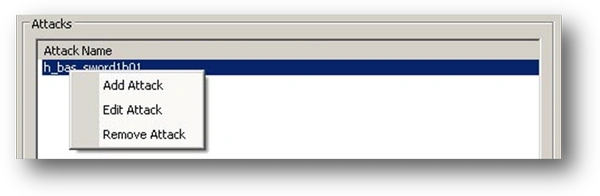
Several attacks can be added to one combat style, creating, in practice, a sequence of attacks. Siegfried will not fight be fighting in our adventure, so one attack will be enough to demonstrate combat style creation and attack sequences.
Conversation[]
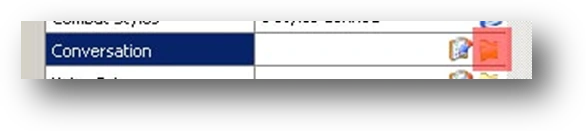
Responsible for a character’s conversation file. Nothing needs to be added here if the player cannot converse with a character. If the player can converse with the character, however, a file needs to be added. Since Siegfried is a key NPC in our adventure, the player will definitely have the possibility to talk to him. However, conversation files for key NPCs are added elsewhere.
Conversation files are assigned more to independent characters such as commoners – city residents, guards, etc. Another chapter of this manual describes how conversation files are created. For now, all we need do is add a conversation file. Click on the small icon located in the right-hand column opposite the Conversation attribute:
This opens the standard Windows window used for loading files. Go to the Data\Dialogues folder (in which all conversation files are saved), find the appropriate file and click Open.
Voice Set[]
Responsible for a character’s conversation file, like the Conversation attribute. The difference here is that the texts are expressed by the character at specific game situations. Another chapter of the manual goes into this in more detail. To attach a conversation file, click on the small yellow icon located in the right-hand column opposite the Voice Set attribute:

Runs to Despawn[]
Determines whether a character will run or walk to the point at which he/she despawns from the game. To change the setting, click on the right-hand column opposite the Runs to Despawn attribute. For Siegfried, set this to False:

The values you can assign to this attribute are:
- -False – the character will walk to the location at which he/she despawns,
- -True – the character will run to the location at which he/she despawns.
Can be pushed[]
Determines whether a character can be pushed. To change the setting, click on the right-hand column opposite the Can be pushed attribute. For Siegfried, set this to True:

The values you can assign to this attribute are:
- -False – the character cannot be pushed from its location,
- -True – the character can be pushed.
Special Section[]
Player Character[]
Determines whether a character can be used as a player. To change the setting, click on the right-hand column opposite the Player Character attribute. Since Siegfried is not going to be used as a player character, select False:

The values you can assign to this attribute are:
- -False – the character cannot be used as the player’s character
- -True – the character can be used as the player’s character.
Plot[]
Determines whether a character is relevant to the storyline. To change the setting, click on the right-hand column opposite the Plot attribute. If set to True, killing this character will be impossible. When the character’s vitality drops to a critical level, the character falls unconscious and will be ignored by all opponents. When the threat passes, the character will rise, but with minimal vitality. Set this to True for Siegfried:
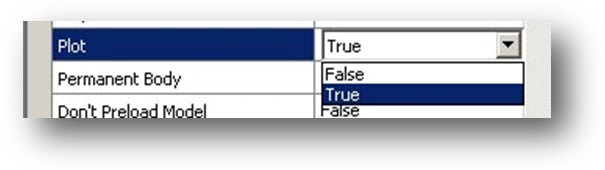
The values you can assign to this attribute are:
- -False – the character can be killed,
- -True – the character cannot be killed.
Permament Body[]
Determines whether the body should change to a skeleton after death or retain its original appearance. To change setting, click on the right-hand column opposite the Permanent Body attribute. For Siegfried, set this to False:

The values you can assign to this attribute are:
- -False – after death the character will transform into a skeleton after a while,
- -True – after death the character will retain its original appearance.
Setting this attribute to False for all characters is recommended. This will help avoid excessive game loading time.
Don’t Preload Model[]
Determines whether a character model should be preloaded into the game. To change the setting, click on the right-hand column opposite the Don’t Preload Model attribute. Selecting the False option is recommended:

The values you can assign to this attribute are:
- -False – indicates a character model will not be preloaded,
- -True – indicates a character model will be preloaded.
In principle, setting this attribute to True should speed things up, but it might prolong the time needed to load particular stages.
Leaves blood stains[]
Determines whether blood stains from wounds earned in combat should remain on a character. To change the setting, click on the right-hand column opposite the Leaves blood stains attribute. For Siegfried, set this to True:

The values you can assign to this attribute are:
- -False – blood stains will disappear after a while,
- -True – blood stains will remain on the character.
Immortal[]
Determines whether a character is immortal. To change the setting, click on the right-hand column opposite the Immortal attribute. For Siegfried, set this to False:
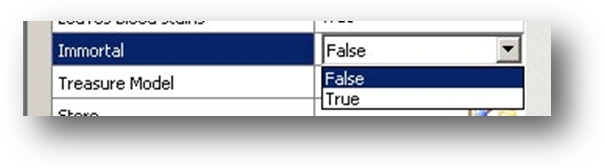
The values you can assign to this attribute are:
- -False – the character is mortal and can be killed,
- -True – the character is immortal and cannot be killed.
Treasure Model[]
Responsible for what appears after a character is slain. To change the setting, click on the right-hand column opposite the Treasure Model attribute. Since Siegfried won’t be killed, set option to default:
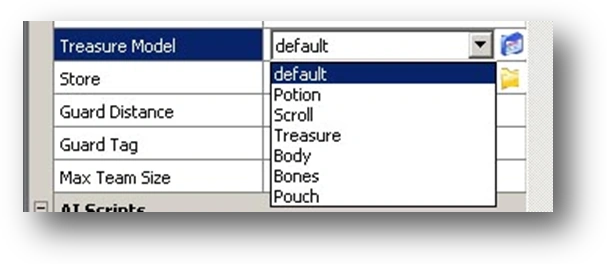
The values you can assign to this attribute are:
- -Default – the default setting,
- -Potion – a potion will appear,
- -Scroll – a scroll will appear,
- -Treasure – treasure will appear,
- -Body – a corpse will appear,
- -Bones – bones will appear,
- -Pouch – a pouch will appear.
Click on the small blue icon located next to the list of options will open the bodybag.2da file, the database containing all the post-mortem character models.
Store[]
Responsible for the store template which the player will be able to access after selecting the appropriate option during conversation with a character. To assign a new store template, click on the small yellow icon located in the right-hand column opposite the Store attribute:
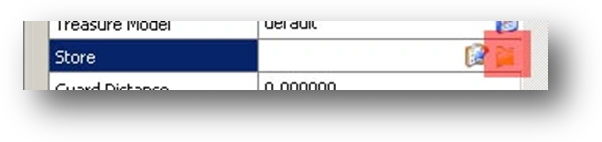
This opens the standard Windows window used for loading files. How to creating a store has been covered in another chapter of this manual.
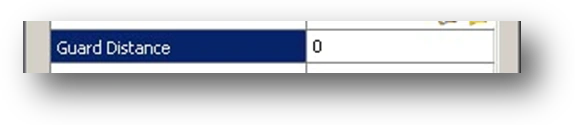
Guard Distance[]
This attribute corresponds to the distance at which a guard will attack Geralt. The next two attributes, Guard Tag and Max Team Size, are closely associated with this one. In The Witcher, teams of characters can be created. As a result, characters can cooperate during an attack or defense. If one character belonging to a team is attacked by an opponent, it will be able to “summon” other characters belonging to the same team to come to its aid. The characters which are set in the Guard Distance attribute will come running. For Siegfried, type in 0 and press ENTER:
Guard Tag[]
The team identifier. All characters which have the same Guard Tag belong to the same team and will be able to cooperate during combat. For Siegfried there’s no need to enter anything here. To enter a tag, simply click on the right-hand column opposite the Guard Tag attribute and enter the appropriate value.
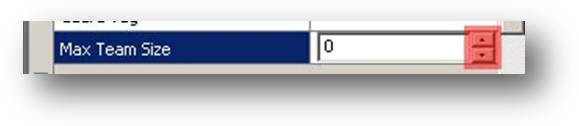
Max Team Size[]
Determines how many characters belong to a team can be summoned to defend another character from the same team. In Siegfried’s case, this attribute is irrelevant so just enter a value of 0. To change the setting, click on the right-hand column opposite the Max Team Size attribute, type in the value and press ENTER:

The value can also be changed using the small arrows located opposite the Max Team Size attribute:
AI Script Section[]
All attributes from this section are responsible for the scripts which will be executed when a character carries out an action, beginning an attack or conversing with another character for example. More about scripting has been discussed in another chapter of this manual. Only script options will be discussed here.
- Script set - Determines the set of pre-defined scripts for a character. This set holds default scripts for certain events in the game. To change the setting, click on the right-hand column opposite the Script set attribute. Set the Default option for Siegfried:

Click on the small blue icon located next to the selection list to open the creaturescripts.2da file, the database containing default script definitions. The values you can assign to this attribute are:
- -Custom – the character will use custom scripts,
- -Default – the character will use default scripts,
- -Shooter – the character will use default scripts specifically for characters using bows and crossbows,
- -PC – the character will use default scripts created specifically for the Geralt,
- -StoryTrissPrologue – the character will use default scripts created specifically for the Triss character from The Witcher storyline.
The events below will utilize created scripts when a Script set is set to Custom option only.
- On Attack Begin - Script will be run when the character starts to attack.
- On Blocked - Script will be run when the character cannot move.
- On Conversation - Script will be run when the character starts a conversation.
- On Damaged - Script will be run when the character receives wounds.
- On Death - Script will be run when the character dies.
- On Disturbed - Script will be run when another character disturbs while an action being carried out.
- On End Conversation - Script will be run when the character stops conversing.
- On End Combat Round - Script will be run when the character finishes attacking.
- On Heartbeat - Script will be run every 5 seconds.
- On Internal Event- Script will be run at the time as some internal event.
- On Out Of Ammo - Script will be run when the character runs out of ammunition (arrows or bolts)
- On Perception - Script will be run when the character sees or hears another character.
- On Physical Attacked - Script will be run when the character is attacked.
- On Rested - Script will be run when the character is resting (meditating).
- On Spawn It - Script will be run when the character spawns at a spawn point.
- On Spell Cast At - Script will be run when the character is affected by a spell.
- On Witness - Script will be run when the character is spotted by another character.
To assign the appropriate script, click on the small yellow icon located in the right-hand column opposite the event to which you want to assign the script. For example, if you want to assign a script to the On Attack Begin event, click here:

User Scripts Section[]
Daily Scripts[]
Script will be run daily at a specific time. This refers to game time, of course. To add the proper script and define its execution time, s, click on the small blue icon located in the right-hand window opposite the Daily Scripts attribute:

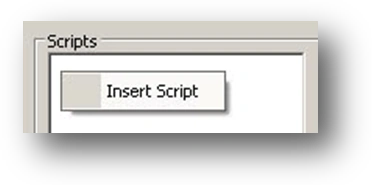
This opens the Daily Scripts window:

Right-click on the Scripts panel and choose Insert Script from the menu:
Now click on the previously added script and set the time at which the script will be run. Enter the values in the Hour and Minute fields:

You can also use the small arrows next to the Hour and Minute fields:

Now click on the small box next to the Script field:

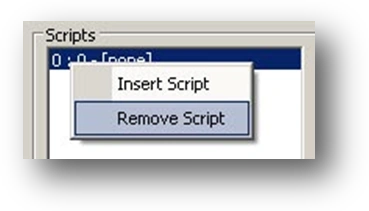
This opens the standard Windows window used for loading files. Select the script to be loaded and click on Open. This way the chosen script will be run daily at the pre-set time. Next, click on OK in the Scripts window. Of course you can add more such scripts.
To remove a script, select it in the Scripts panel and right-click on it. Choose Remove Script from the menu:
On User Defined[]
Script is defined by the user. To add this type script, click on the small icon located in the right-hand column opposite the User Defined attribute:

This opens the standard Windows window used for loading files. Select the appropriate script and click Open.
Lua Scripts Section[]
This section also handles scripts. These scripts, however, are more advanced (written in the LUA language) and will not be discussed in this manual.
- On Creation - Script will be run when the character spawns in the game.
- On Model loaded -. Script will be run when the character model is loaded into the game.
And that’s it. Now let’s save Siegfried’s template. To do so, select Save As… from the File menu:

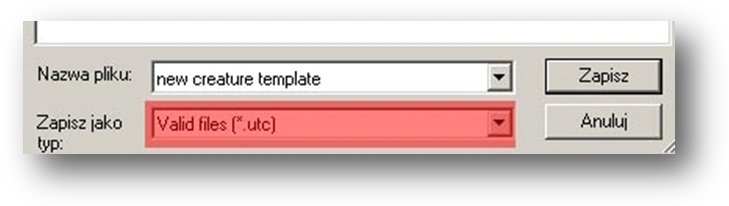
This opens the standard Windows window used for saving files. Since Siegfried is an NPC, save him in the Templates\Characters\NPC folder. Go to this folder, enter our_siegfried and click Save. Remember that the name of the file cannot exceed 16 characters. Otherwise the D’jinni Editor will not see it. Make sure the file is saved in the .utc format:
If a different type of file is listed instead, it probably means that you’re trying to save the content in another open window by accident. Before saving a character template, make sure that the new creature template window is active. If it is inactive, the title bar will be grey:
A different color means that the window is active:
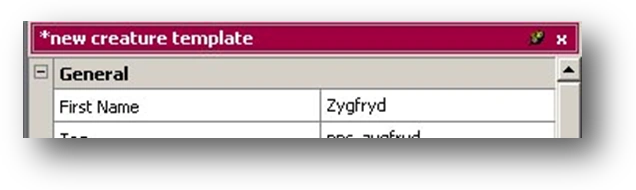
An asterisk before the name in the title bar means that the file has not been saved since the last change was introduced.
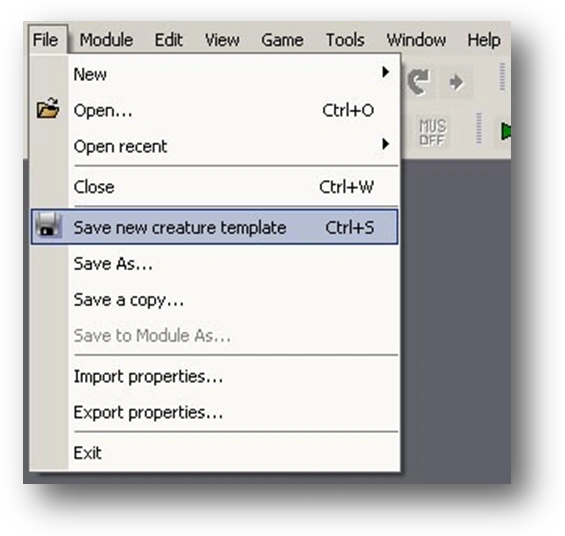
Well done. The first creature template has been created. Before continuing, let’s save the file in a different way. Instead of selecting the Save As… command from the File menu, select the Save new creature template command:
A Save File window will appear:
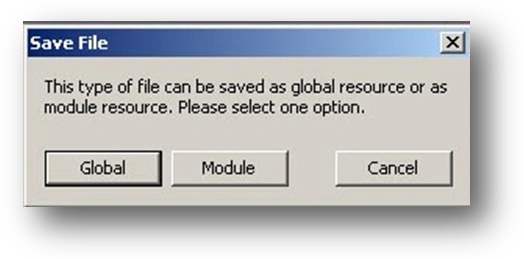
Selecting Global will bring the same result as selecting the Save As… command from the File menu. All files saved this way are global files, indicating that they may be used in other modules. Saving this way has its drawbacks though, because the file is not specifically attached to a module. In order to make modules easy to upload on to the internet and simple to use, all files should be saved to the module.
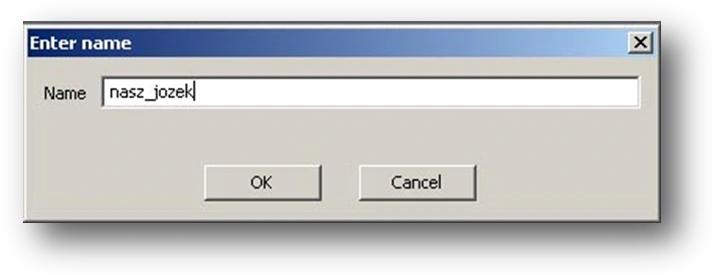
For example, what happens when two people use the same file name? This is where saving a file directly to the module comes to the rescue. To save a file this way, click Module in the Save File window. The Enter name window will open. Type in the file name, in this case our_jethro, and click OK:
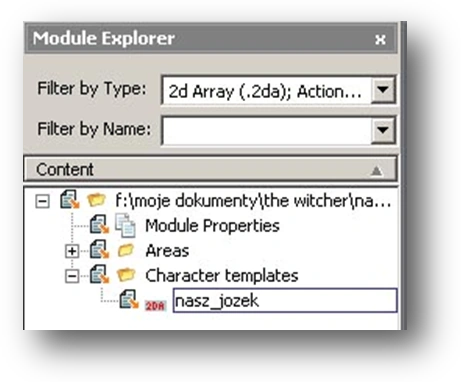
The file will be saved directly to the module which is visible in the Module Explorer window on the Character templates tree:
The save method employed in this manual uses the Save as… command from the File menu. Later in this manual, a different method of adding files to the module will be presented.
Four additional templates have to be created. You are already capable of creating these templates, but to facilitate this task, the options used to select particular character attributes will be described below. From the File menu select New -> Template -> Creature (.utc). The familiar new creature template window will open:
- Jethro, the avid poker player:
- First name – Jethro,
- Tag – our_jethro,
- Appearance – cr_guard1_c1g1,
- Race – Human,
- Gender – GENDER_MALE,
- Movement Rate – Normal,
- Perception Range – Default,
- Profiles – Attitude_Friendly, Behavior_Defensive,
- Abilities – cr_level10,
- Inventory Contents – Big weapon -> WitcherSteelSword -> Temerian steel sword (it_stlswd_005.uti),
- Combat Styles – WitcherSteelFast / WitcherSteelSword -> h_bas_sword1h01,
- Script set – Default.
Leave the remaining attributes with their default values. This creature template should be saved to the Templates\Characters\Commoners folder under the name our_jethro. Make sure the file is saved in the .utc format.
- The Professor, the ring-leader of the bandits:
- First name – The Professor,
- Tag – our_professor,
- Appearance – cr_prof2_c1g1,
- Race – Human,
- Gender – GENDER_MALE,
- Experience Value – 100,
- Movement Rate – Fast,
- Perception Range – Default,
- Profiles – Attitude_Hostile, Behavior_Aggressive, Affiliation_Boss, Role_DoNotHelpFriends, Role_IgnoreAll, Role_PCAttacker,
- Abilities – AutoJump, finisher_1h_sword, HeavyWounded, Wounded,
- Inventory Contents – Right hand -> Weapons & Armor -> Witcher’s silver sword (it_svswd_004.uti),
- Combat Styles – WitcherSteelFast / WitcherSteelSword -> h_adv_sword1h01,
- Script set – Default,
Save this template in the Templates\Characters\NPC folder under the name our_professor.
- Bandit leader’s guard:
- First name – Bandit,
- Tag – our_bandit,
- Appearance – cr_band2_c1g1,
- Level – 1,
- Race – Human,
- Gender – GENDER_MALE,
- Experience Value – 50,
- Movement Rate – Fast,
- Perception Range – Default,
- Profiles – Attitude_Hostile, Behavior_Aggressive, Enemy_Witcher, Role_PCAttacker,
- Abilities – AutoJump, finisher_1h_sword, HeavyWounded, Wounded,
- Inventory Contents – Right hand -> Weapons&Armor -> Witcher’s silver sword (it_svswd_004.uti),
- Combat Styles – WitcherSteelFast / WitcherSteelSword -> h_bas_sword1h01,
- Script set – Default,
Save this template in the Templates\Characters\Enemies folder under the name our_bandit.
- Wolf
- First name – Wolf,
- Tag – our_wolf,
- Appearance – cr_dog2_c1g1,
- Level – 1,
- Race – Animal,
- Gender – GENDER_MALE,
- Experience Value – 25,
- Movement Rate – Normal,
- Perception Range – Short,
- Profiles – Attitude_Hostile, Affiliation_Monster_Animal, Behavior_Aggressive, Tactics_DontSurround, Enemy_Witcher,
- Abilities – AutoJump, cr_m_f_dog01, HeavyWounded, LightyWounded, Wounded,
- Inventory Contents – Right hand -> Weapons&Armor -> Natural weapon (it_natural_001.uti),
- Combat Styles – Monster / Monster -> m_f_dog_att01,
- Run To Despawn – True,
- Script set – Default,
Save this template in the Templates\Characters\Monsters folder under the name our_wolf.
That’s it for creating creature templates. After reading this chapter and creating these five templates, you should have a general feel for template creation. You’ll learn more as you experiment with them too. In the meantime, let’s take a look at how to define character behavior.