Classic method[]
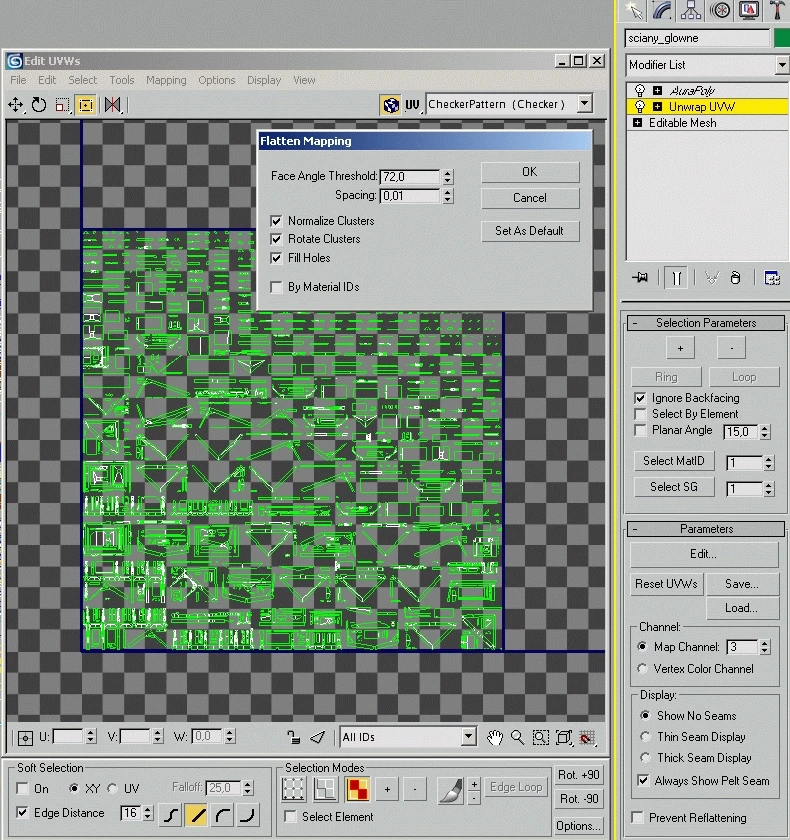
In this method we use classic UVW layout using UnwrapUVW tool. We lay out channel 3 using Flatten Mapping method.
 Each object in the scene can have only one lightmap attached. The rule is: one object – one lightmap.
We attach it using AuraPoly modifier like this:
Each object in the scene can have only one lightmap attached. The rule is: one object – one lightmap.
We attach it using AuraPoly modifier like this:
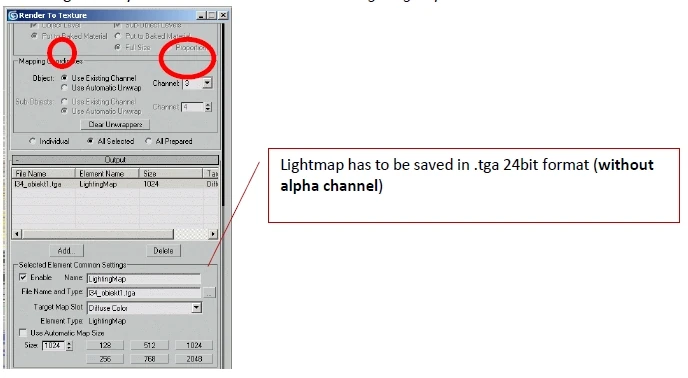
Rendering is run by Render To Texture window with LightingMap element attached.
Method using RTT Group[]
In this method we use RTT Group for laying out UVW and attaching lightmaps. You can attach any number of lightmaps to any number of objects in the scene. UVW coordinates are saved in a special modifier on the stack of modifications of each object belonging to RTT group.
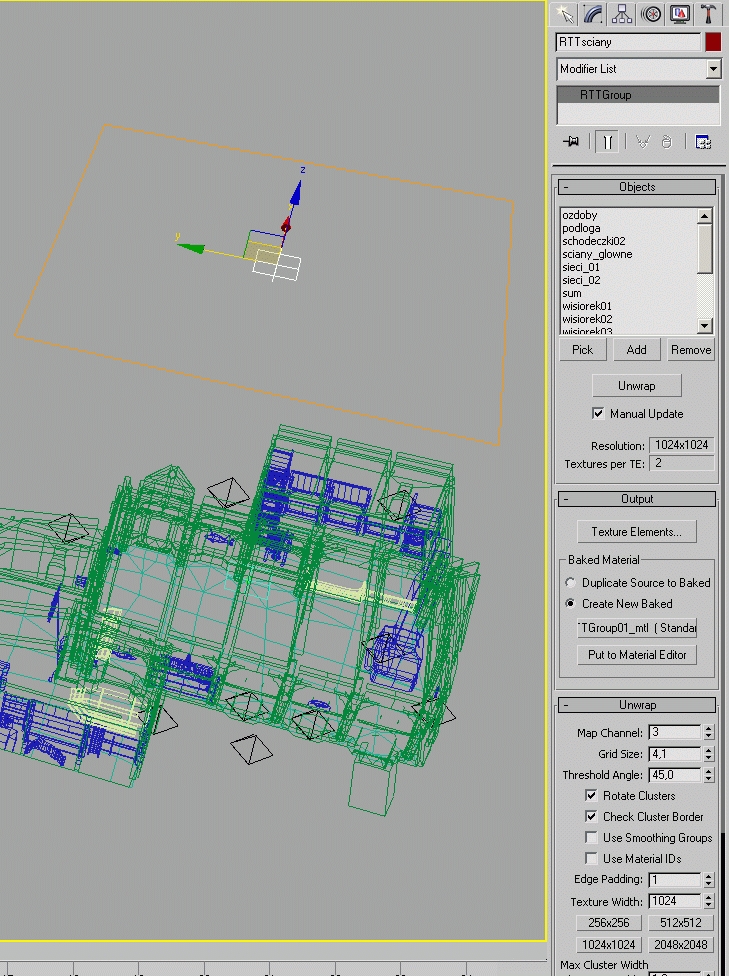
Each object has to have AuraPoly modifier with following attributes:
In order to create RTT group we create RTT Group’s object which is located in helpers category. Then, using Add or Pick buttons, we add objects (which are of interest to us) to the group. In the next stage, we do Unwrap layout, during which a special modifier with saved mapping coordinates will be attached to selected objects.
Unwrap layout using RTT for objects attached to a group:
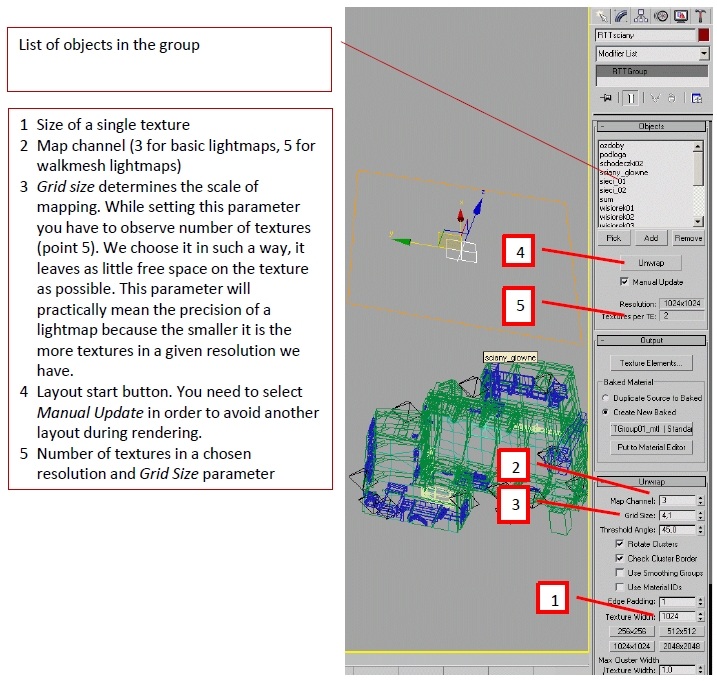
After layout is done you cannot change the number of vertices (triangles) on the object mesh as it will ruin the UVW coordinates. However, you can see or modify layout on them by adding UnwrapUVW modifier to the stack.
Attaching a lightmap to objects from RTT group is done by Texture Elements button:

Rendering is started by Render To Texture (RTT) tool in the Utility tab:

In order to run automatic calculation of Advanced Lighting (Radiosity) together with lightmaps’ rendering, you need to select Compute Advaced Lighting when Required after Render To Texture is run.

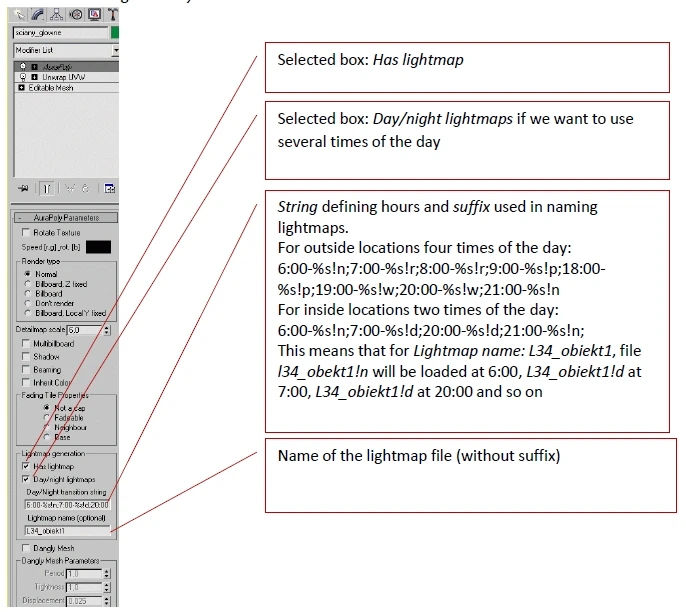
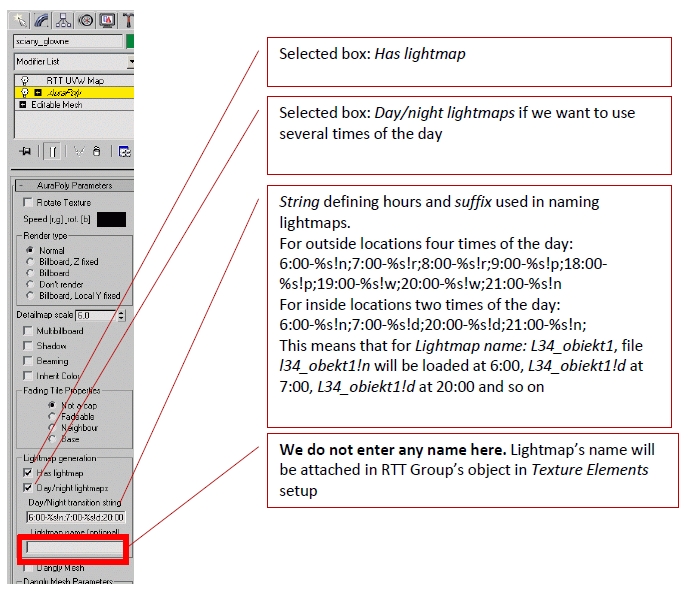
The above described method will give us files with base names, like e.g.: L34_obiekt1. If we used day/night lightmaps string, we have to change those names according to pattern included in the string, e.g. L34_obiekt1!d, L34_obiekt1!n etc. Next we have to place the files in the target lightmaps’ directory.
Method using RTT Group and LM Render tool[]
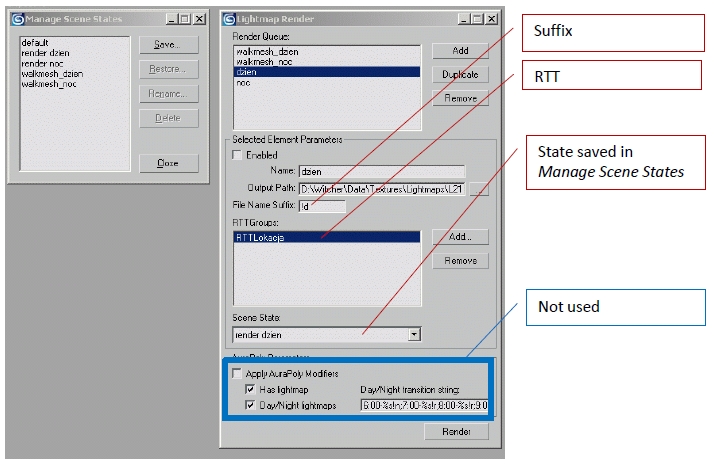
LM Render is a tool which makes rendering automatic, enables using Manage Scene States and saving lightmaps with set suffixes in a target directory. Thanks to this you can prepare a scene with saved render settings for several times of the day and run service-less render, e.g. for the whole night.
In order to use LM Render, first you have to prepare a scene just like in RTT Group method. Using Manage Scene States you can save scene states for individual render stages, e.g.: lighting setting and position for given times of the day, hiding or revealing individual layers.
LM Render tool enables setting render queue with choosing saved scene states and specific RTT
Groups as well as target directory and suffix.
Walkmesh lightmap[]
Walkmesh has its lightmap used for lighting objects like placeables or characters present on it, using scene’s dynamic lights. You attach it in Walkmesh Mod modifier, which should be added to scene’s AuraBase. Walkmesh Mod includes Components box, to which we add all objects that are to be a walkmesh. Each component has 3 parameters: Lightmaped, Has Grass, IDs from texture. Selecting Lightmaped box will automatically create WlkmeshRTTGroup object with this component and UVW channel 5 attached to it. Each object in the scene can simultaneously be walkmesh and have two lightmaps: basic on channel 3 and walkmesh on channel 5.
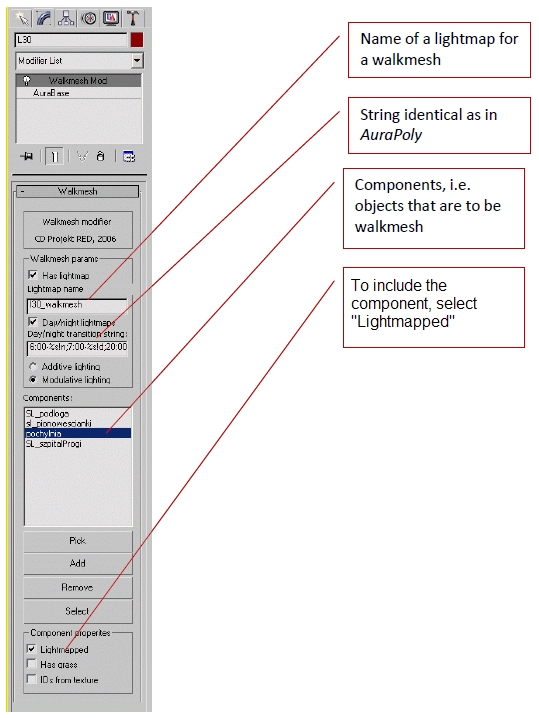
Unwrap layout and lightmap’s name are set in an identical way as in basic lightmaps, with only one difference – we set map channel to 5 and there can be only one walkmesh lightmap per location.
